Pinhole photography with a HOLGA WPC
On the 1st October 2019 started the Holga Week where you take photos using Holga products only. A Holga is an iconic low price plastic camera which is known for their light leaks and vignettes. The Holga 120 S was the first model produced for the China market in 1982. In the meantime there are much more models available and I own also some of these.
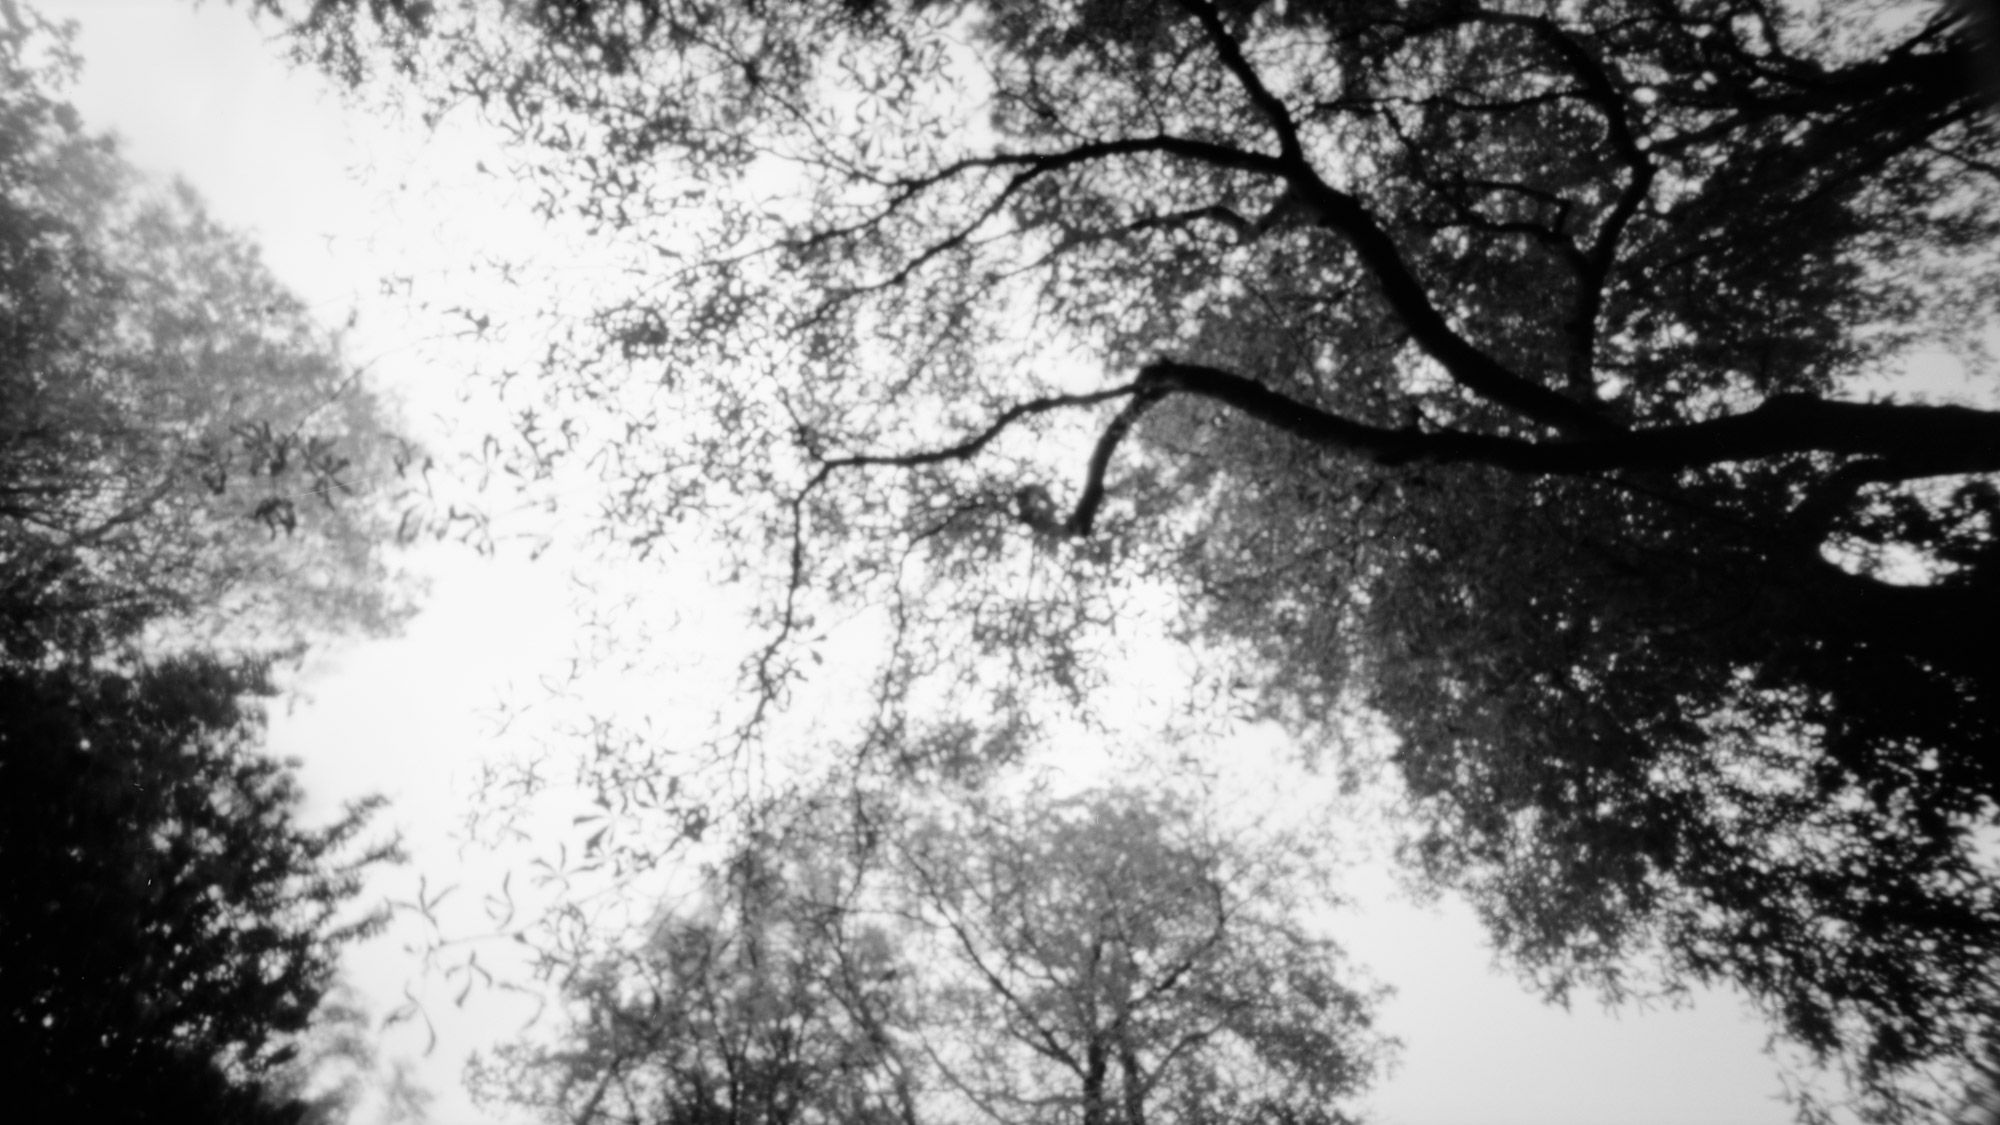
I wanted to make some pinhole photos because I like the different look and the remarkable atmosphere it can give. So I decided to take my Holga 120 WPC camera, my tripod and some expired Kodak TMax black and white film.
WHAT IS SO SPECIAL ABOUT A PINHOLE CAMERA?
First it has no lens like other normal cameras. There is only a very tiny hole for the light to pass through. This leads to a much longer exposure time of several seconds or minutes. For instance the Holga WPC 120 has an aperture of F/135 with a 0.3 mm small pinhole.
Then the look of the pictures has a special characteristic with it's infinite depth of field. This causes an even sharpness where everything is in focus whether it's near or far away.
HOLGA WPC 120 FEATURES
The Holga WPC is a super wide medium format camera which gives full 120 degrees. You can insert one of two provided masks. The bigger is a 6x12 frame where you get six pictures per 120 film roll. Also a smaller one is available for nine pictures in a size of 6x9.
HOW TO TAKE A PINHOLE PICTURE?
What you need is a pinhole camera with some 120 film, a tripod, a cable release, a light meter and maybe a timer.
You have to do the following steps:
- Load the film in the camera and notice the ISO
- Choose the scene you want to capture
- Set the camera on a tripod and compose the frame
- Measure the exposure time with a light meter for the given ISO
- Calculate the exposure time for your aperture and consider the reciprocity failure if the time exceeds 1 second
- Attach the cable release
- Start the timer and take the photo
that's all you need to start capturing your first pinhole picture.
Now I will show you some results of the photo sessions. There were seven days to capture the images for the contest. Meanwhile I developed and scanned the first films. I chose the Adox APH-09 b/w film developer for a stand development of 60 min @20°C.
After all pictures are done I have to select three of them to submit to the contest. I'm really excited about the different outcomes from the other participants, but it will take some time until the announcements in November...
Here a selection. All taken with a HOLGA 120 WPC Wide Pinhole camera on Film Kodak TMAX 100 pro - expired 12/2000 film.
Useful links:
- Find more information about the contest at the Holga Week website.
- Look at www.mrpinhole.com as a great reference with links and tools about pinhole cameras.
- Visit my Flickr Album "Pinhole - Capture the Time" with more photos.
- Read my article about 4x5 Pinhole photography with a HARMAN TiTAN camera
- Watch this video (from 5:40min) on how to frame the scene without a viewfinder
Comments
Dave(7th November 2020 02:52)
How do you set up a scene since there is no viewfinder?
Thanks
Steffi(8th November 2020 14:56)
Hi Dave, thank you for your question :-) In the beginning it also puzzled me. And I will add some more content on how to do this.
Mainly you have to follow the light beam through the pinhole. It means you can estimate the frame by extending the line from the right side of the film plane to the pinhole and vise versa. I recommend to watch this video (from 5:40min), which covers this with a good explanation.
Enjoy taking pictures! Bye Steffi
Recent Posts:
Published at
6th October 2019
Author
Reading time / mode
Share
RssTags
Recent Posts
- Photo series: A foggy morning on the Wakenitz
![A morning in the fog on the Wakenitz taken on Ilford FP4+ film. Thick fog envelops the landscape in a mystical backdrop. Soft, blurred outlines of trees and water create a calm, dreamlike atmosphere.]()
- Photo series: A winter day, captured on Kodak TRI-X 400 film
![Winter impressions in the snow by the river. Taken with a Minolta XD-7 camera on Kodak TRI-X 400 film. Winter impressions in the snow by the river. Black and white picture taken on Kodak Tri-X 400 film.]()
- Redscale film photography - the light from the other side
![Striking light. | Redscale pinhole photography with a Holga WPC 120 Redscale film photo shows a wood scene with a lot of trees and a striking light beam.]()
- Autumn walks and discovering the Kodak Gold 200 film
![Lights will inspire you. | taken on Kodak Gold 200 color film. Colorful Autumn path way with trees and sunshine.]()
- Photo series: Wakenitz taken on LomoChrome Purple color film
![Fern taken with LomoChrome Purple XR 100-400 film Fern in purple colors.]()
- Photo series: FP4 Party week and my foggy images
![Faded lights. | Hasselblad 500 CM taken on Ilford FP4+ film for the FP4 Party week Foggy view of a mystic path way along with trees and a biker in the center.]()

